Landing Pages and Platform Pages
The Event Landing Pages are pages that are visible to visitors; they are publicly accessible and can be accessed via the top navigation bar on the landing page by default.
Event Platform Pages are pages that are only visible to logged-in users. By default, they can be accessed via the left-hand menu.
How to create a new page:
- Click on Page Builder in the menu on the left under Event Website Builder; the following page will open:
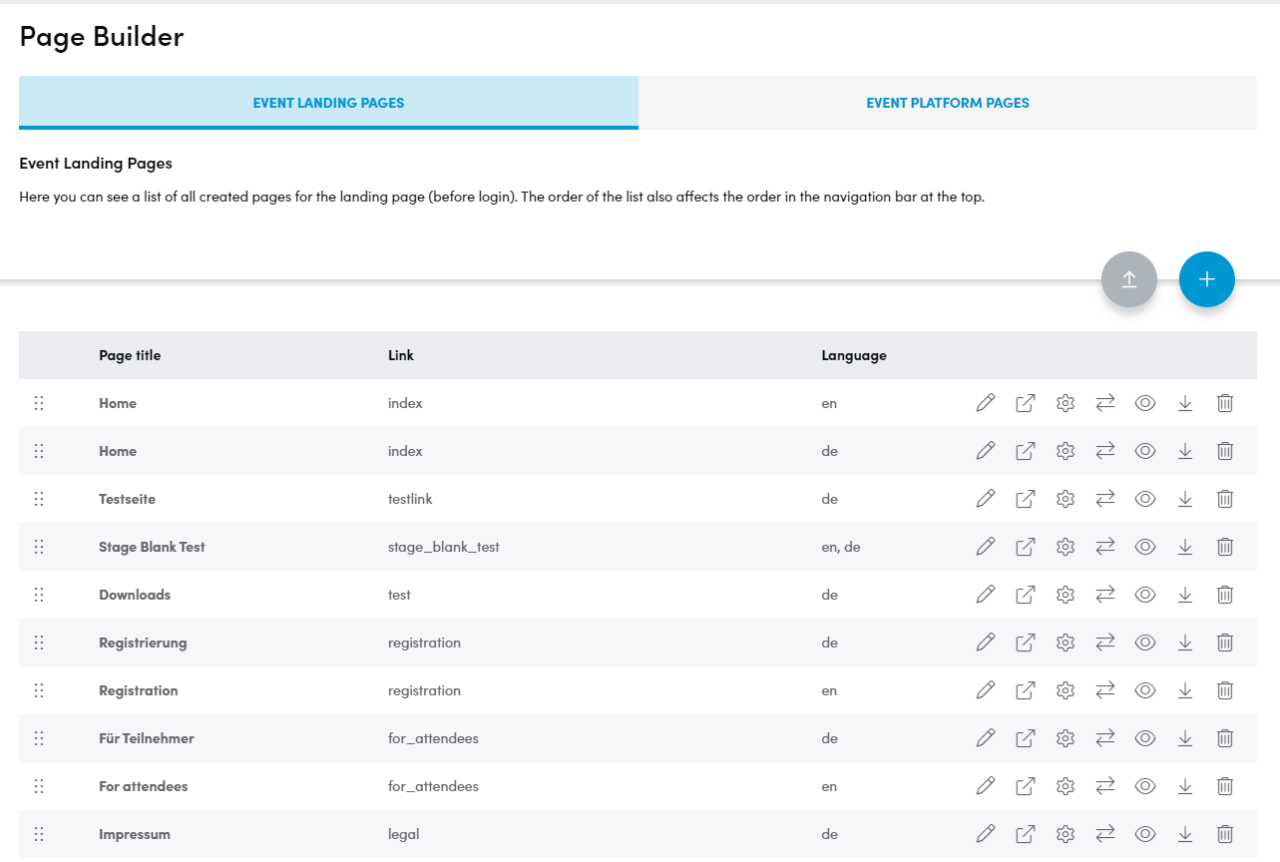
- You can display the desired category via the two tabs Event Landing Pages and Event Platform Pages.
- Click on the blue + on the right. A window will now open in which you can choose between three page types::
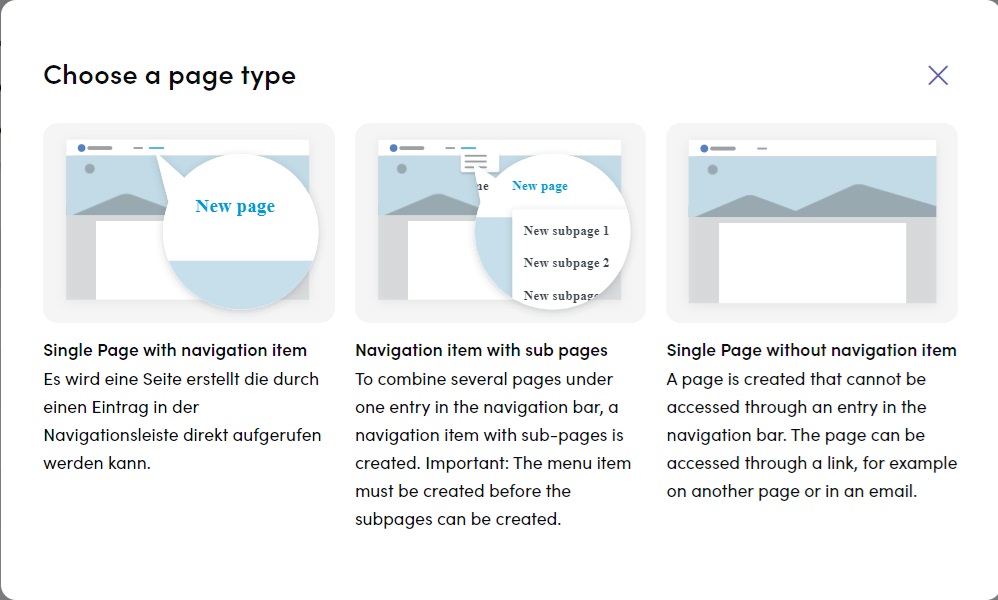
4. Click on the desired page type. You will now be taken to the page settings.
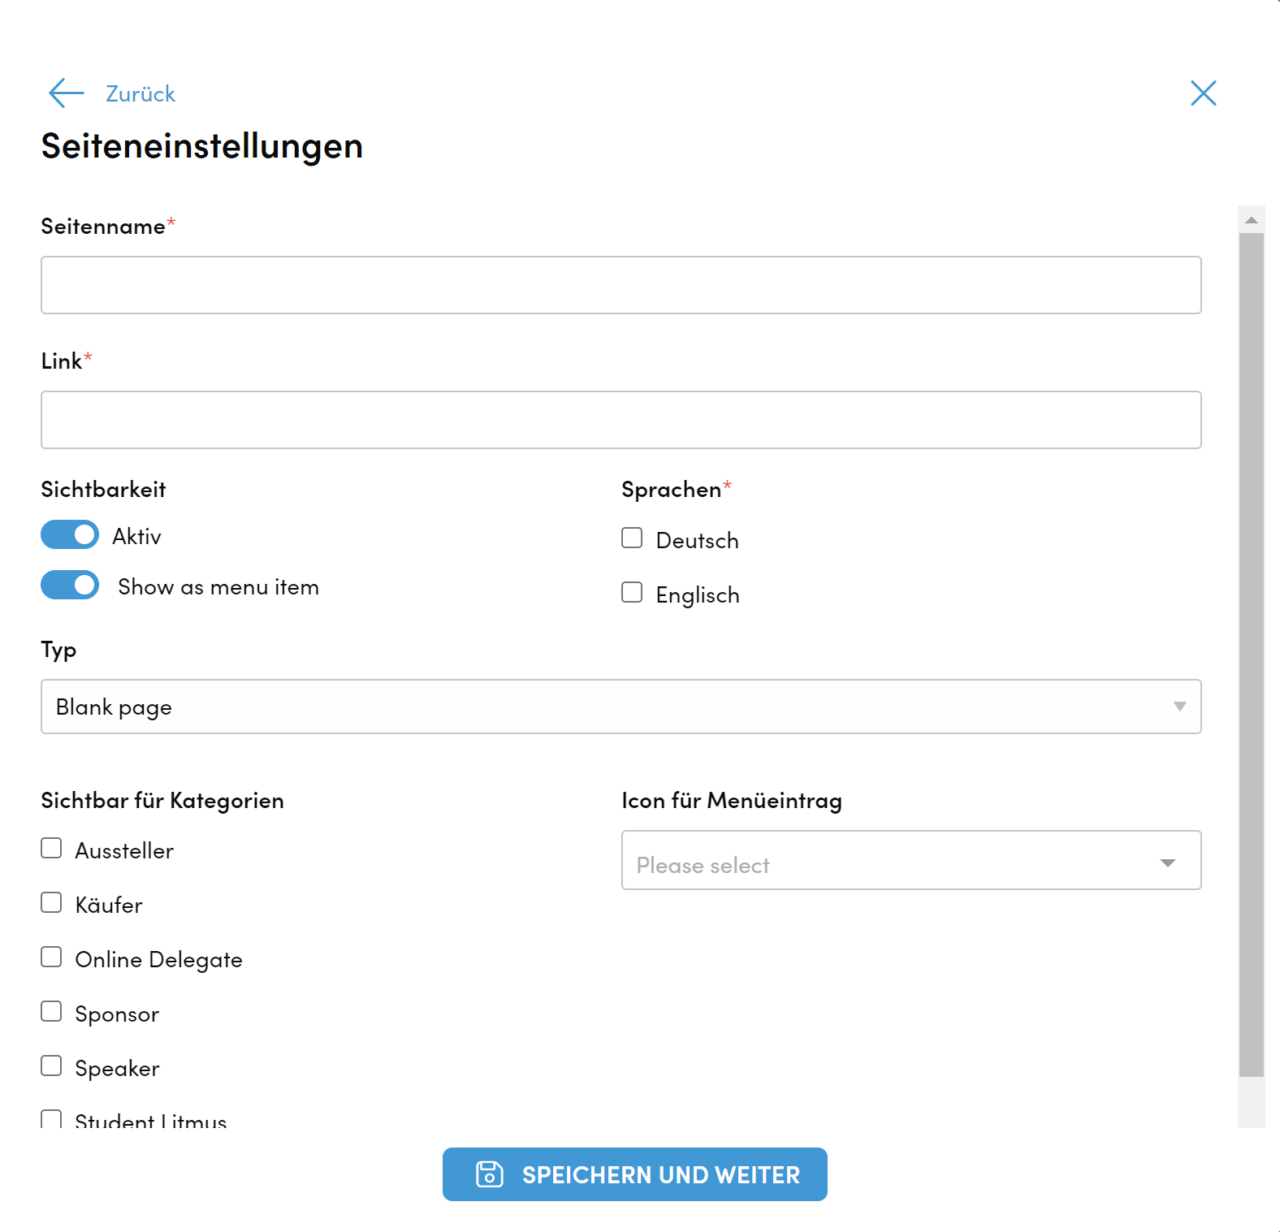
5. Enter a page name and a link. It is advisable to re-enter the page name as the link.
6. A page can be (de)activated using the Active button.
7. The Show as menu item button determines whether the page should be visible in the navigation bar.
8. If your event platform is available in several languages, each page must be created individually for each language and the respective box for the language assignment must be ticked.
9. You can change the desired page type again in the Type drop-down menu.
10. Check the user categories for which the page should be visible.
11. You can assign an icon in the Icon for user menu drop-down menu.
12. Click on save and go on to create the page with the settings you have made.
Edit Pages
Event Landing Pages and Event Platform Pages can be adapted and personalized in a variety of ways. This is how you edit the pages you have created:
- In the menu on the left under Event Website Builder, click on the sub-item Page Builder.
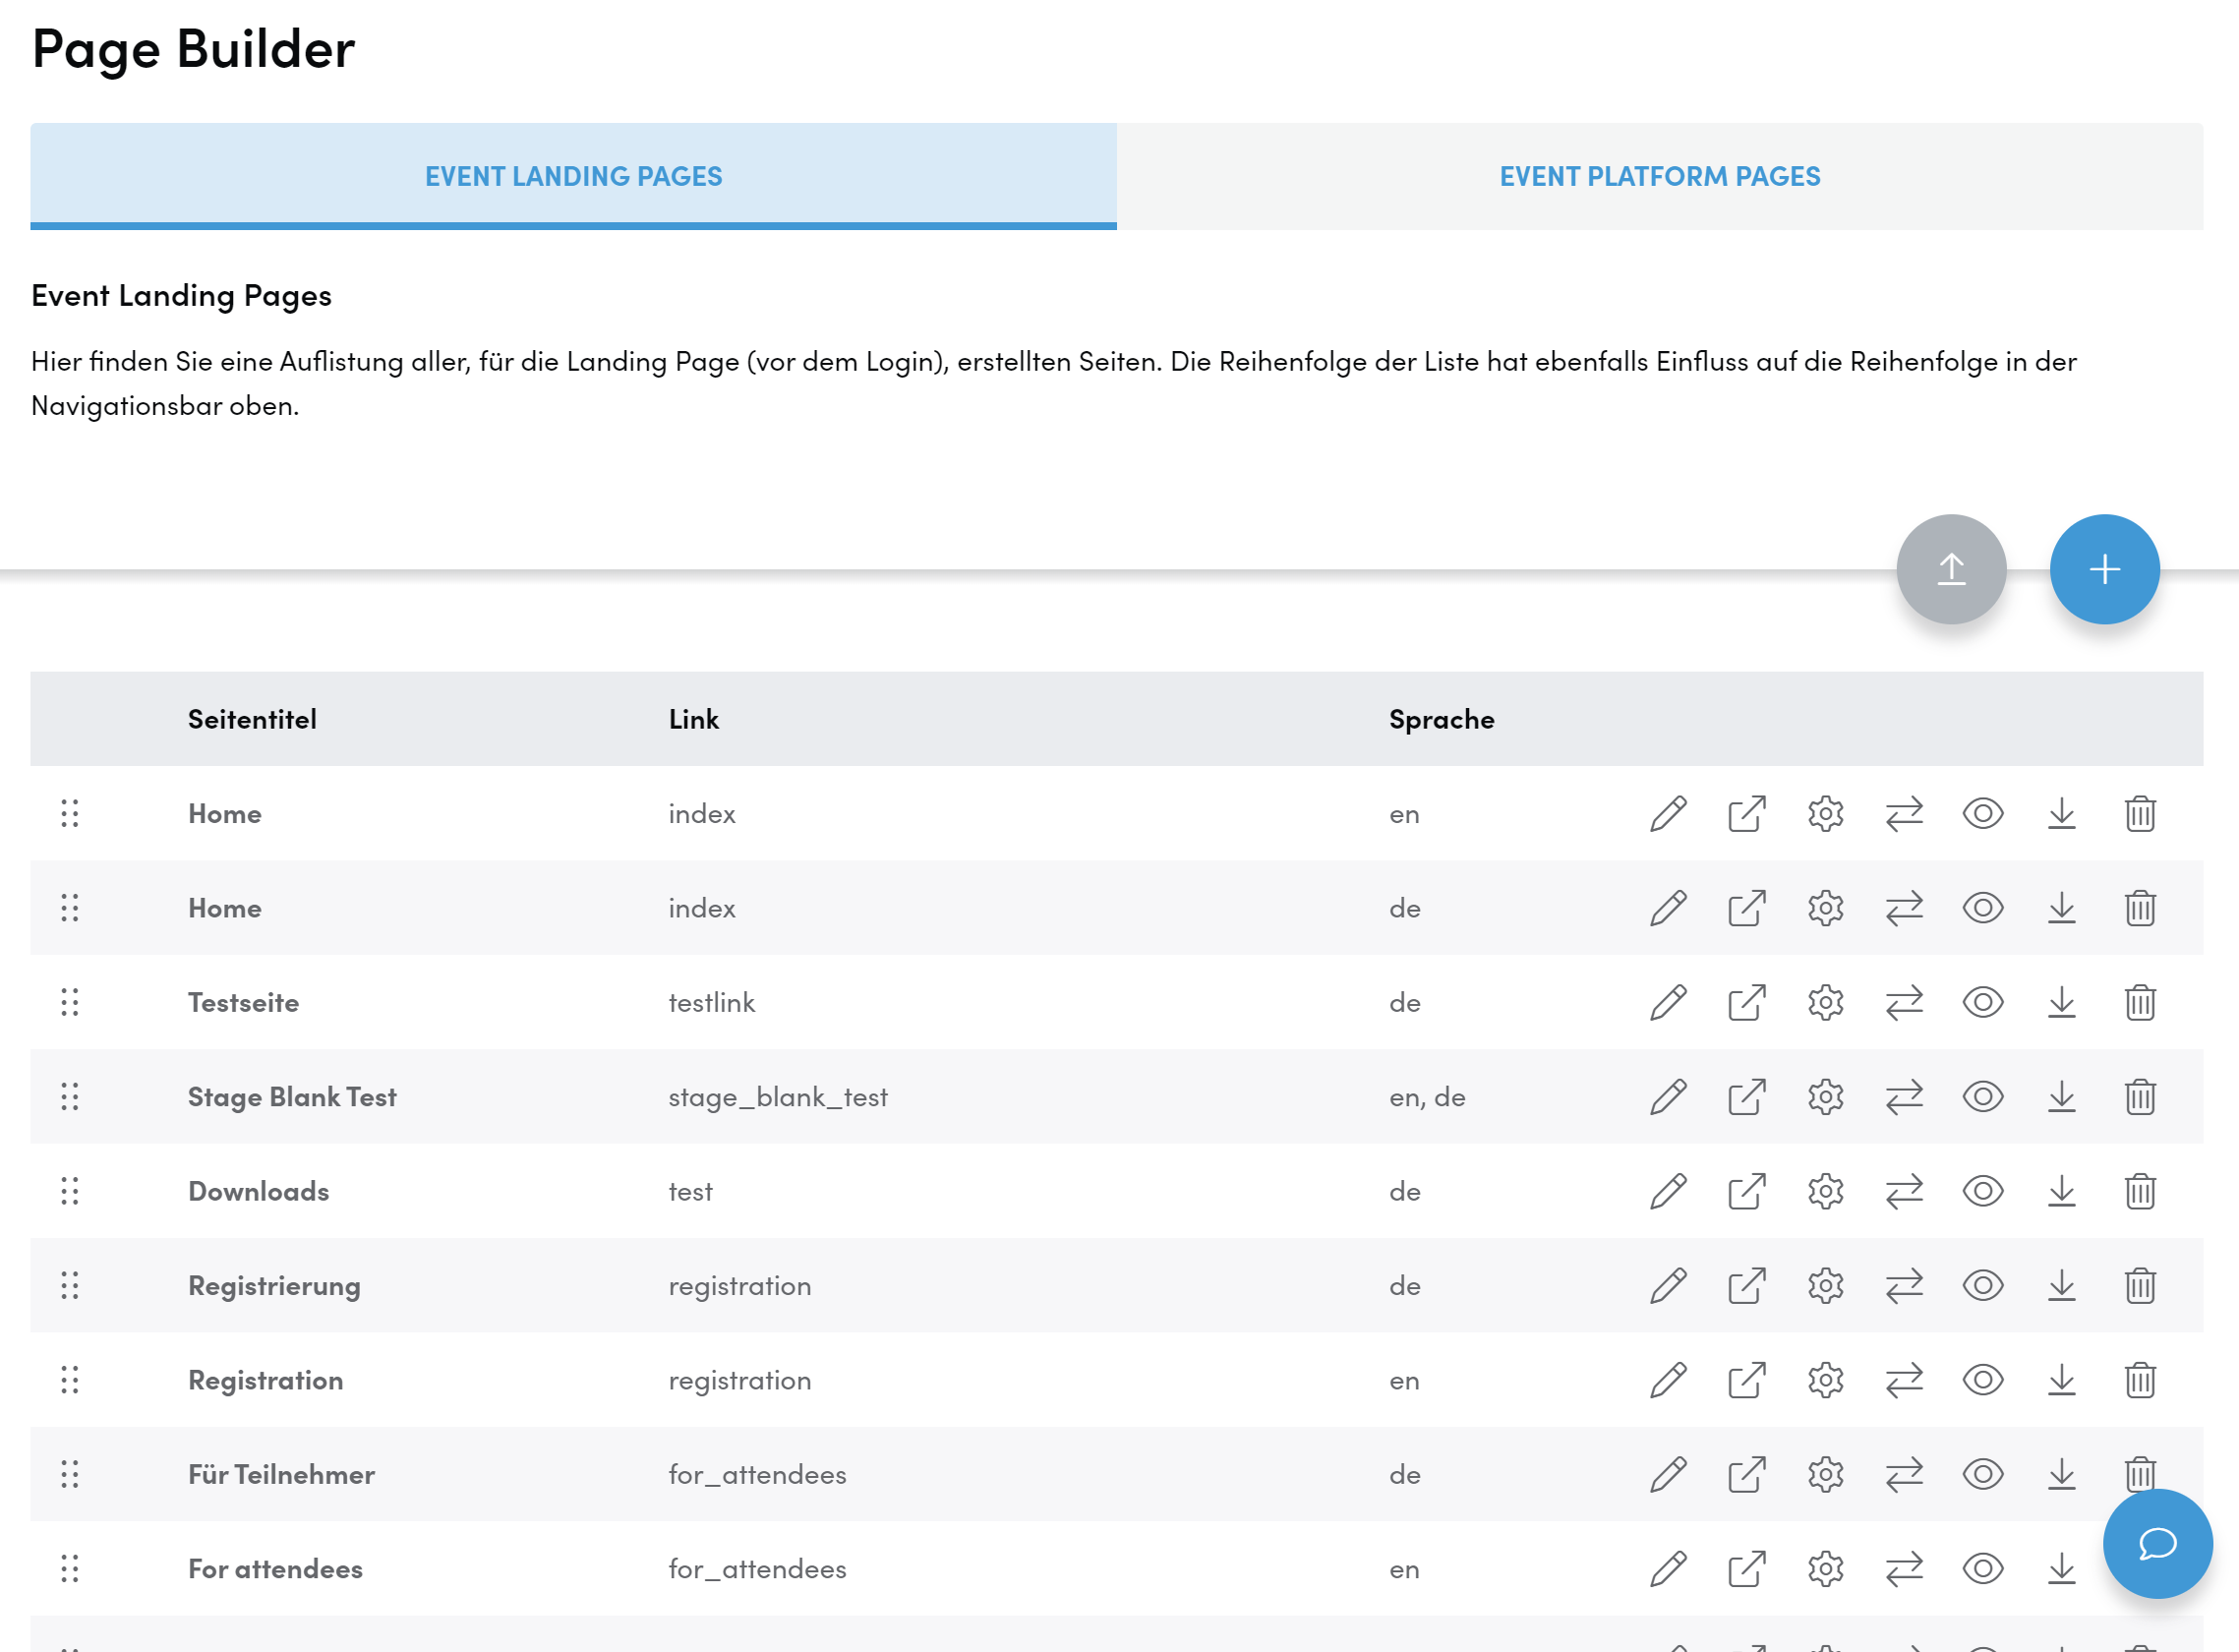
2. You will now see an overview of all the pages you have created so far. On the right, you will see a series of icons with different functions for each page:
-
Edit Page

-
Open page to preview

-
Edit page settings

-
Transfer: Moving the page as a subpage to a navigation title or to event platform pages/event landing pages

-
Hide page

-
Export page

-
Delete page

- To edit the content of your page, click on the pencil icon. This will take you directly to the page overview where you can edit or add content using the blue + button. You can find out what options you have on the following pages.
- To edit settings such as the page name or link or to change the language of a page, click on the cogwheel icon.
- To change the arrangement of your pages, click on the icon to the left of the page title, hold it down and move the page to the desired position.

Copy pages from other platforms
In addition to the pages that you create individually with the help of the Page Builder, you can also copy and upload your own pages that you have already used on other platforms. You can also duplicate pages from the same platform – this is useful, for example, if you want to create pages in multiple languages, since the structure can already be adopted.
- In the platform from which you want to copy a page, click the Page Builder subitem in the left menu under Event Website Builder.
- Choose between Event Landing Pages and Event Platform Pages and find the page you want to copy.
In addition to the pages that you create individually with the help of the Page Builder, you can also copy and upload your own pages that you have already used on other platforms. You can also duplicate pages from the same platform – this is useful, for example, if you want to create pages in several languages, as the structure can already be adopted.
- In the platform from which you want to copy a page, click on the item Event Website Builder aPage Builder.
- Choose between Event Landing Pages und Event Platform Pages and search for the page to be copied.
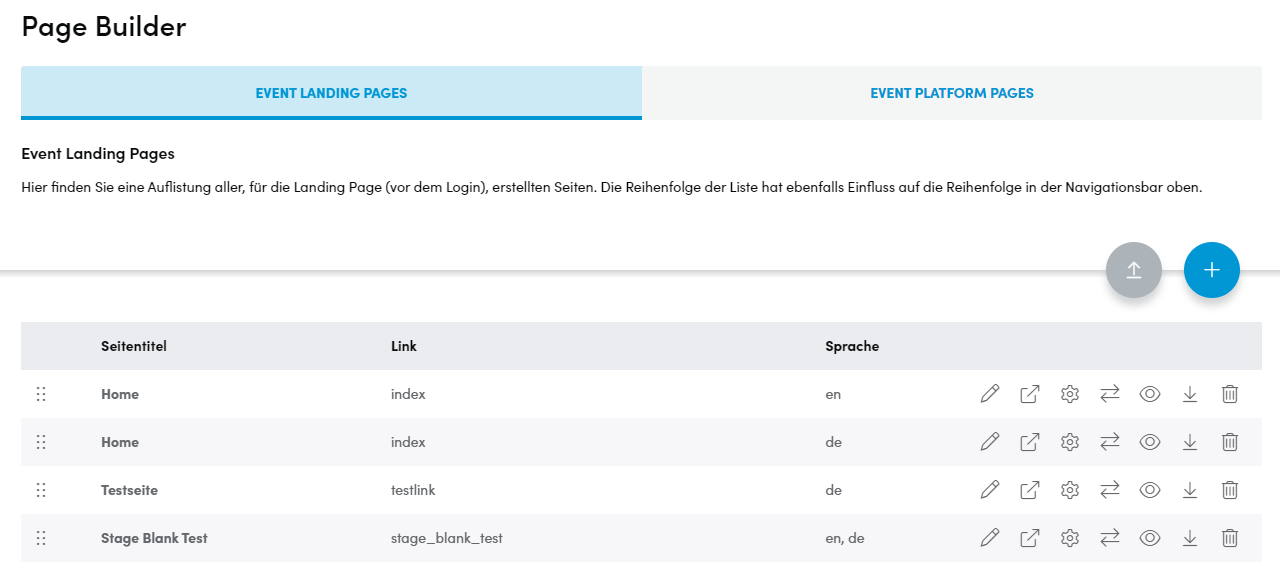
3. Click the Export button on the right.

4. Once the download was announced successful in the top right corner of your screen, you can upload the page to another or the same platform.
5. In the Page Builder of the desired platform, click the gray Upload button on the right.
6. From your directory, select the page you just downloaded. The page now appears in the Page Builder at the bottom of the list and can be edited and moved as desired.
Text Element
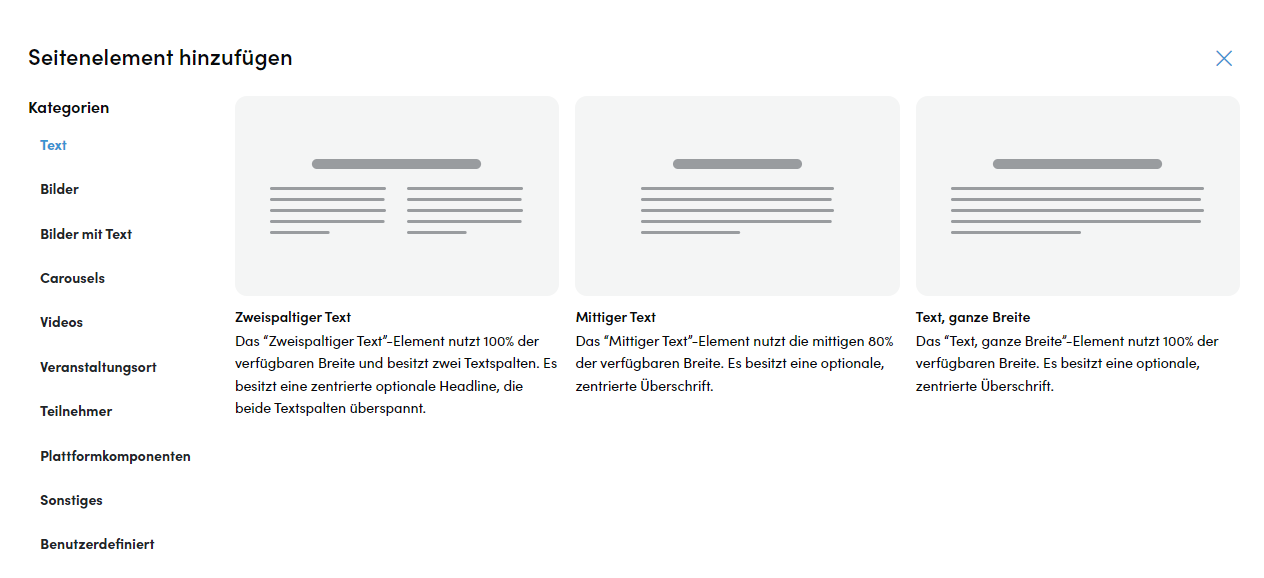
- Select the desired format and insert the text in the respective text field.
- If you want to copy text from another document, e.g. from Word, make sure that the “Paste as text” symbol is activated so that no formatting problems occur when pasting.
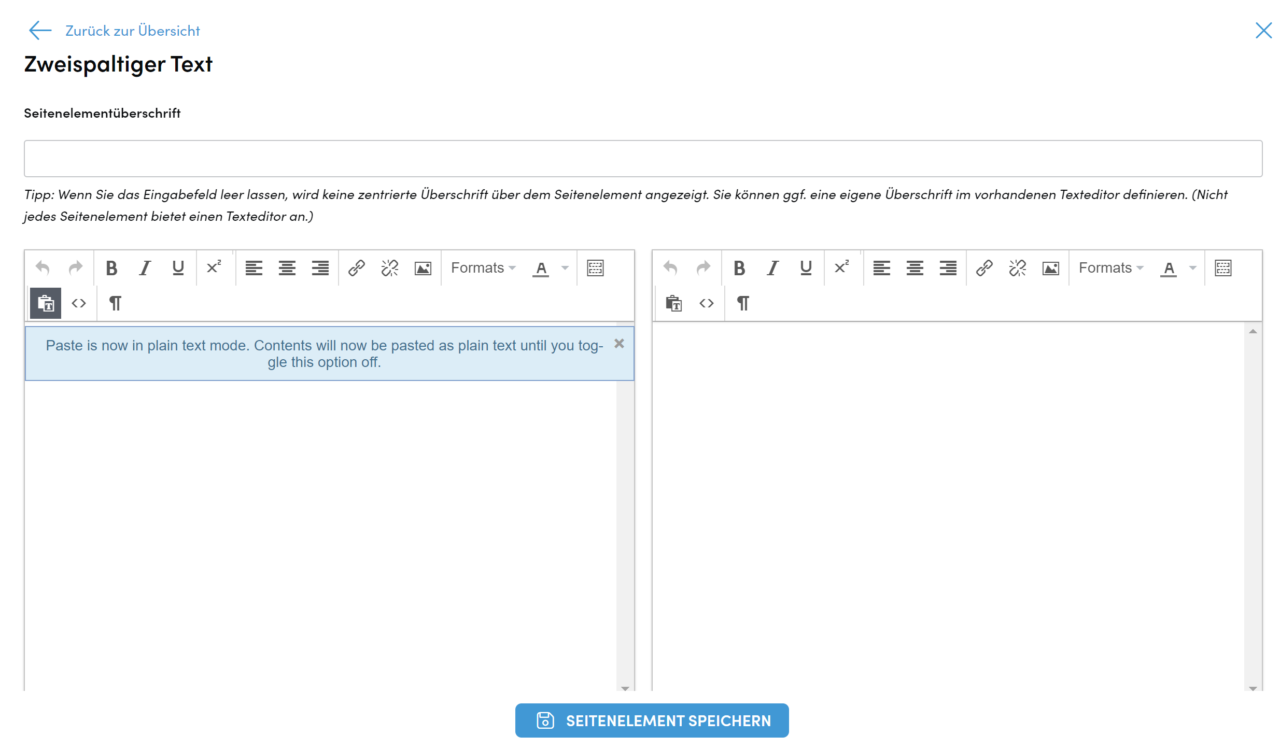
3. Click on Save element, to apply your changes..
Image Element
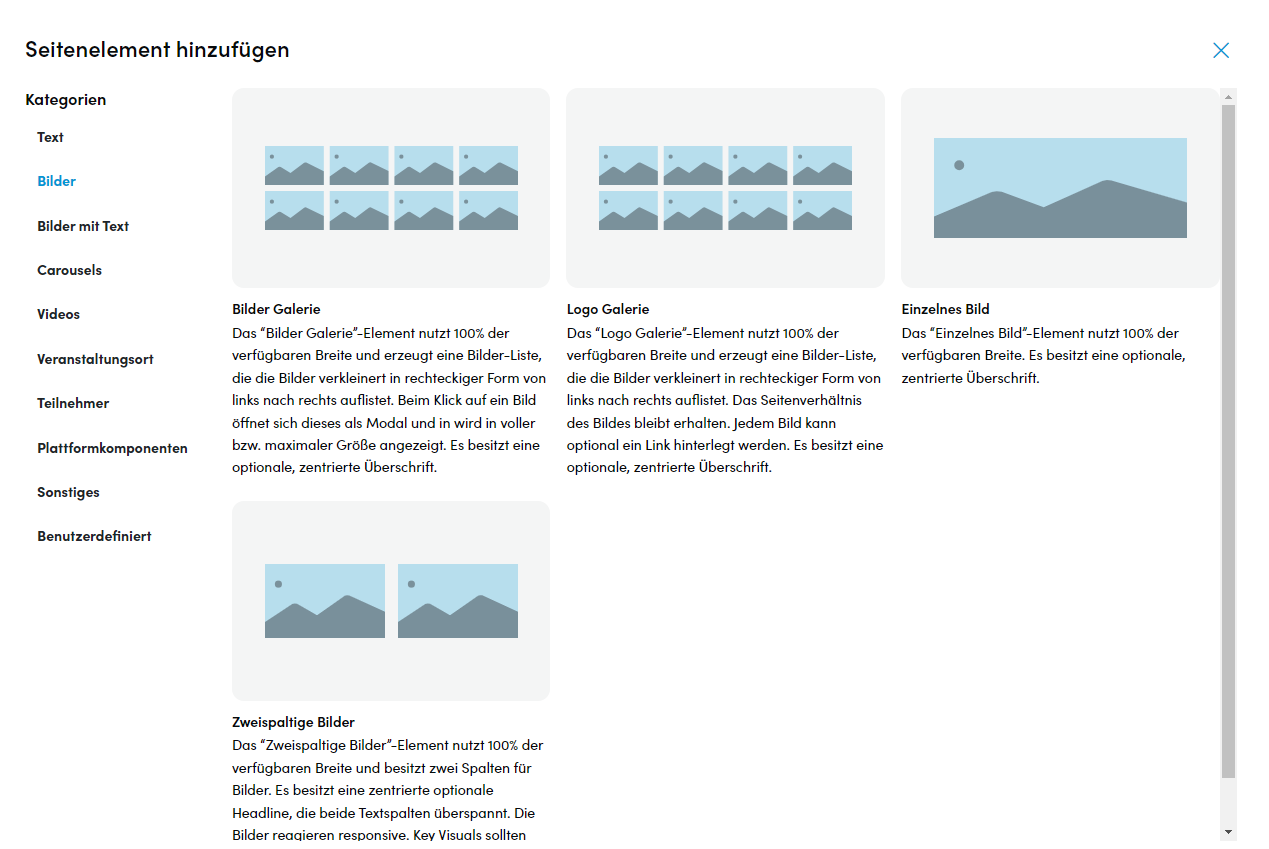
- Select one of the four display types and an editing window will open:
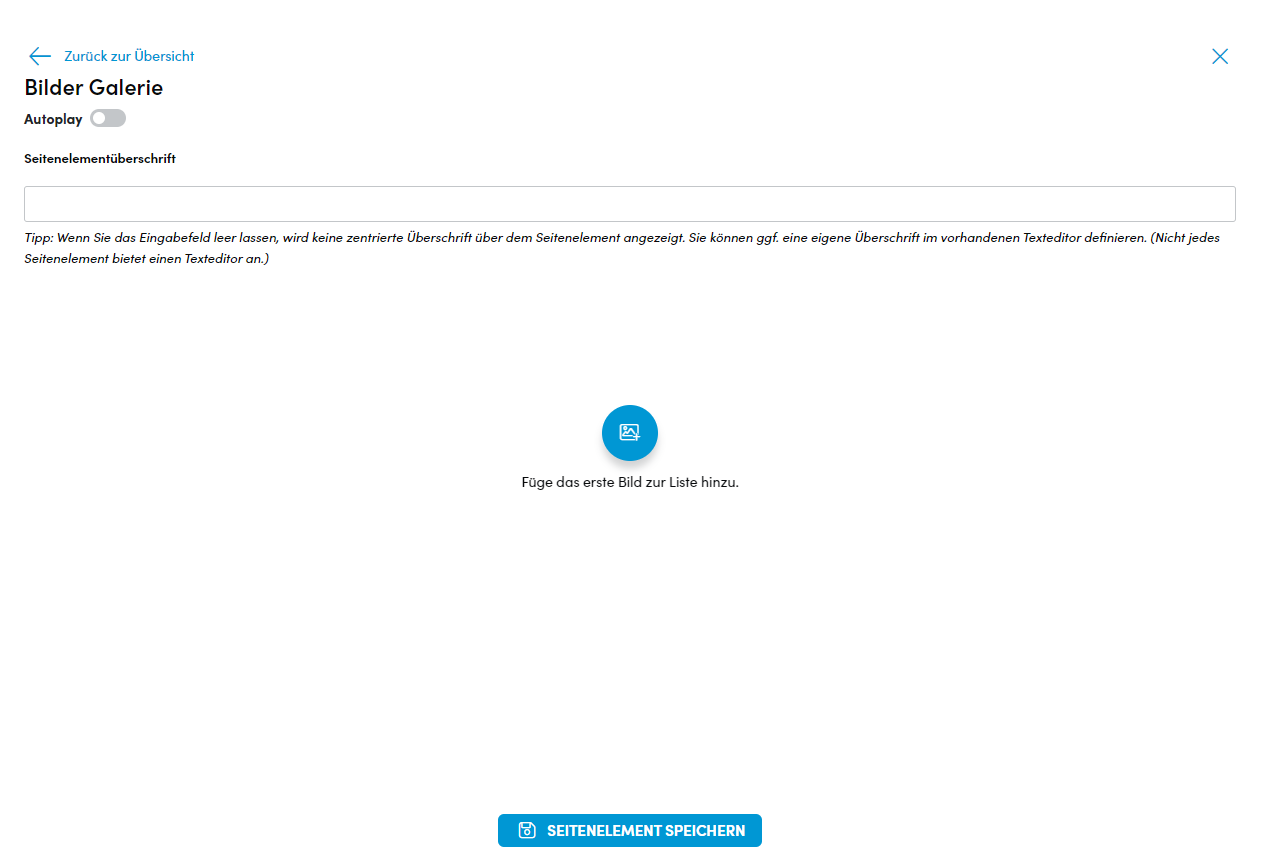
- You can enter a heading or leave the input field empty.
- Images can now be uploaded via add first image list item.
- Click on save element to apply your changes
Image with Text Element
Images and texts can be combined directly as a page element:
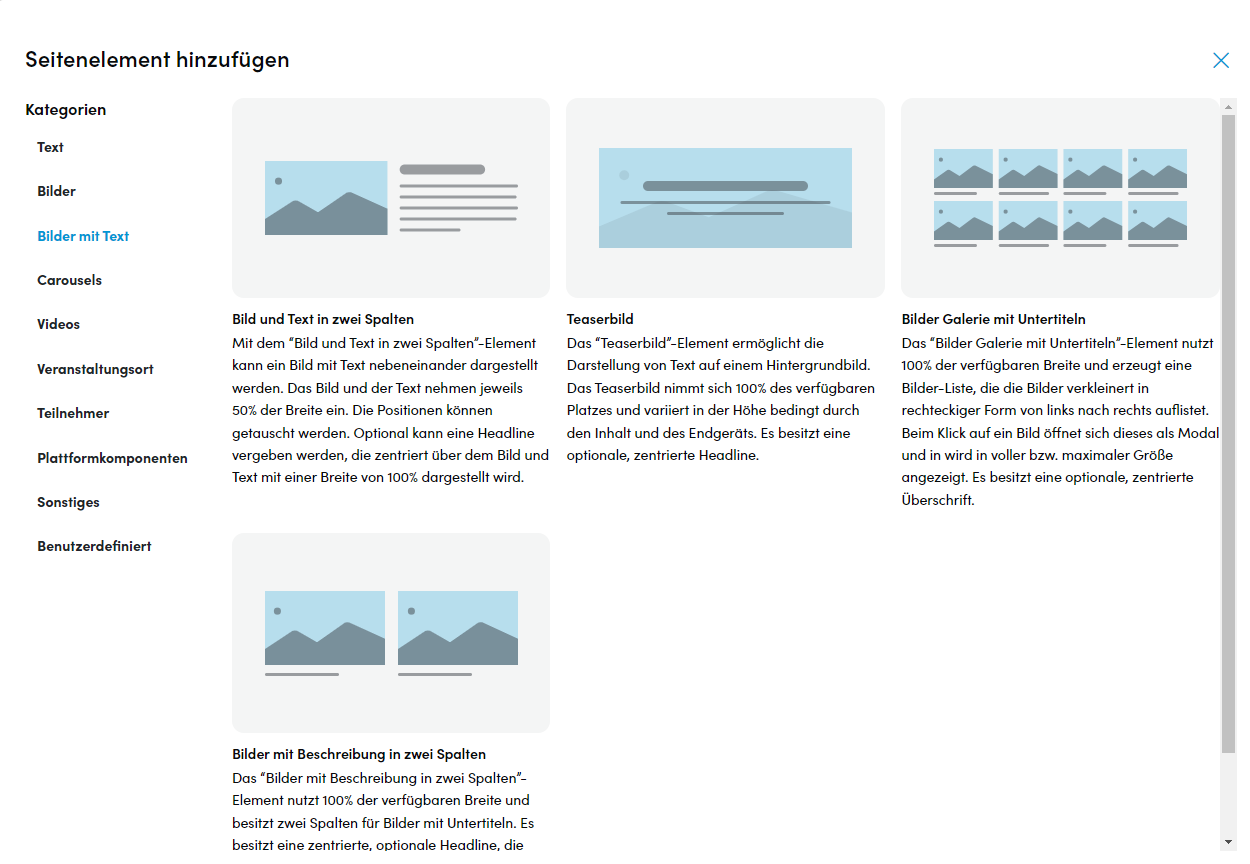
- Click on the desired display format to open an editing window:
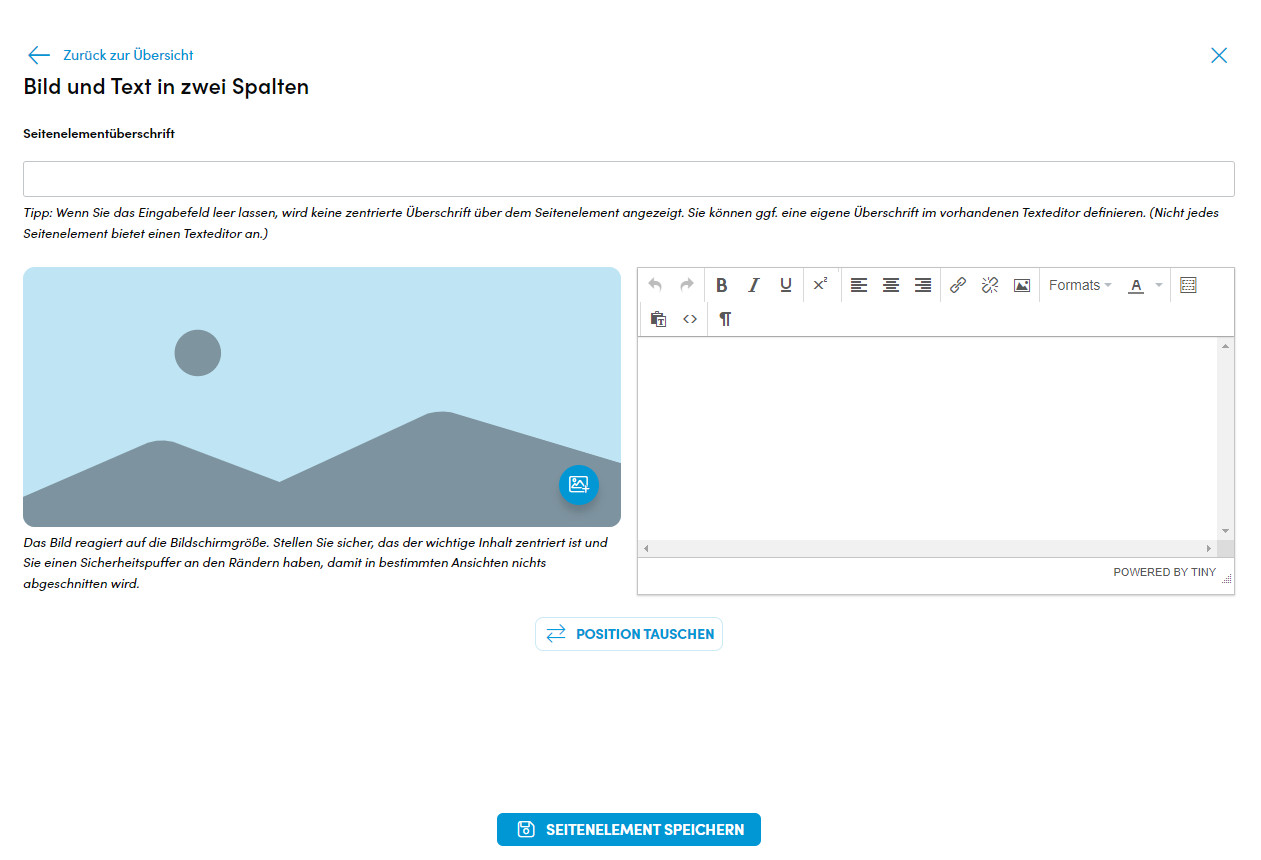
- You can enter a heading or leave the input field empty.
- Upload images using the blue button.
- Enter your text on the rigth.
- If you want to copy text from another document, e.g. from Word, make sure that the “Paste as text” symbol is activated so that no formatting problems occur when pasting.
- You can change the arrangement of the created elements using the Swap position button.
- Once you have made all the settings, click Save element at the bottom.
Carousel Element
You can use the Carousels page element to display images dynamically.
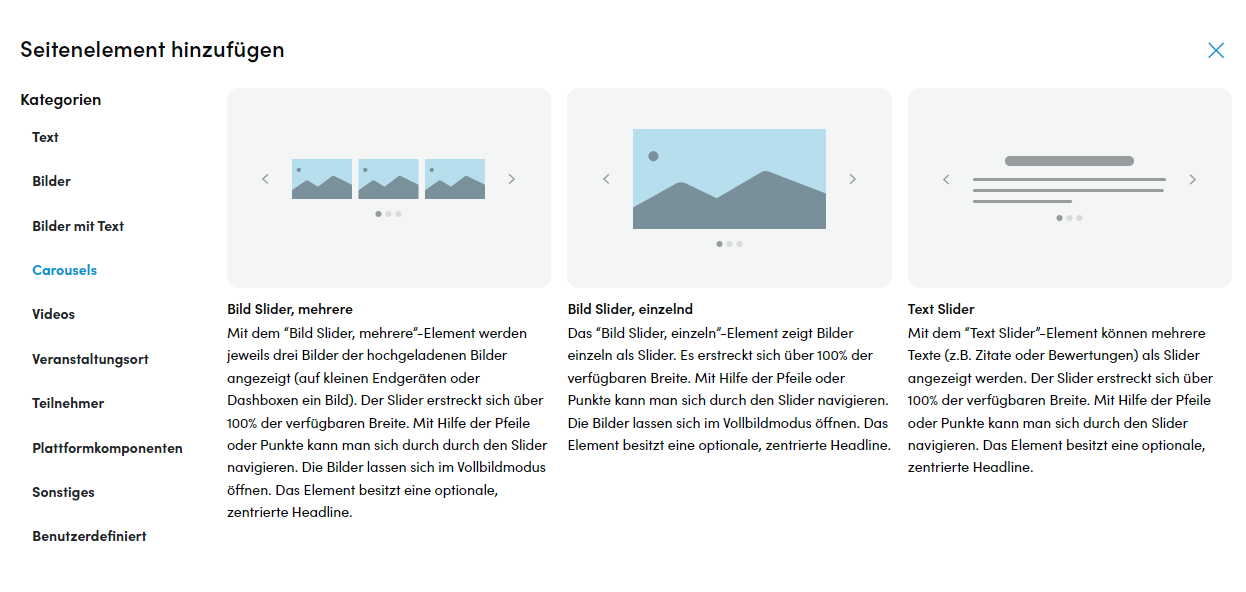
- Click on the desired Carousel. You will now see the following window:
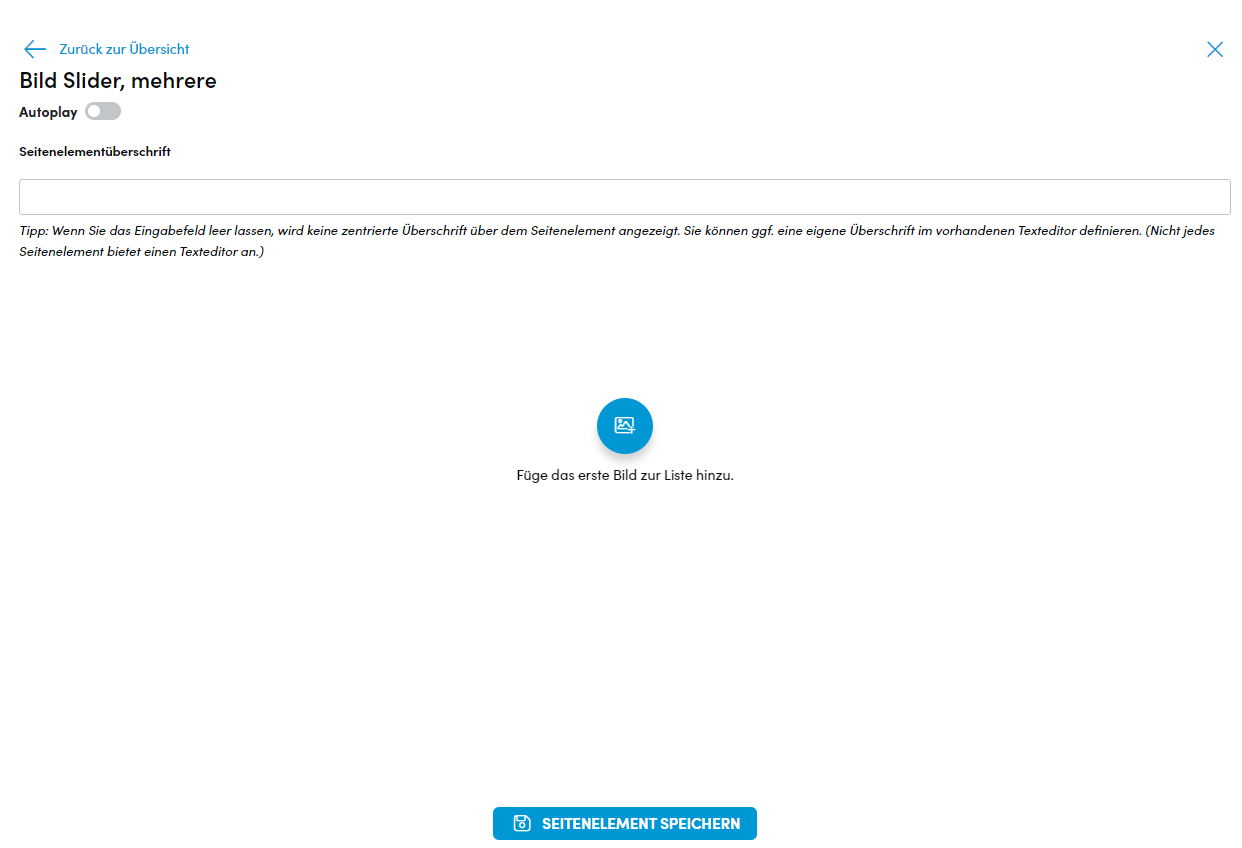
- You can enter a heading or leave the input field empty.
- Images can now be uploaded via the blue button in the middle.
- Click on save element to apply your changes
Videos Element
In addition to images and text, videos can also be integrated into your platform:
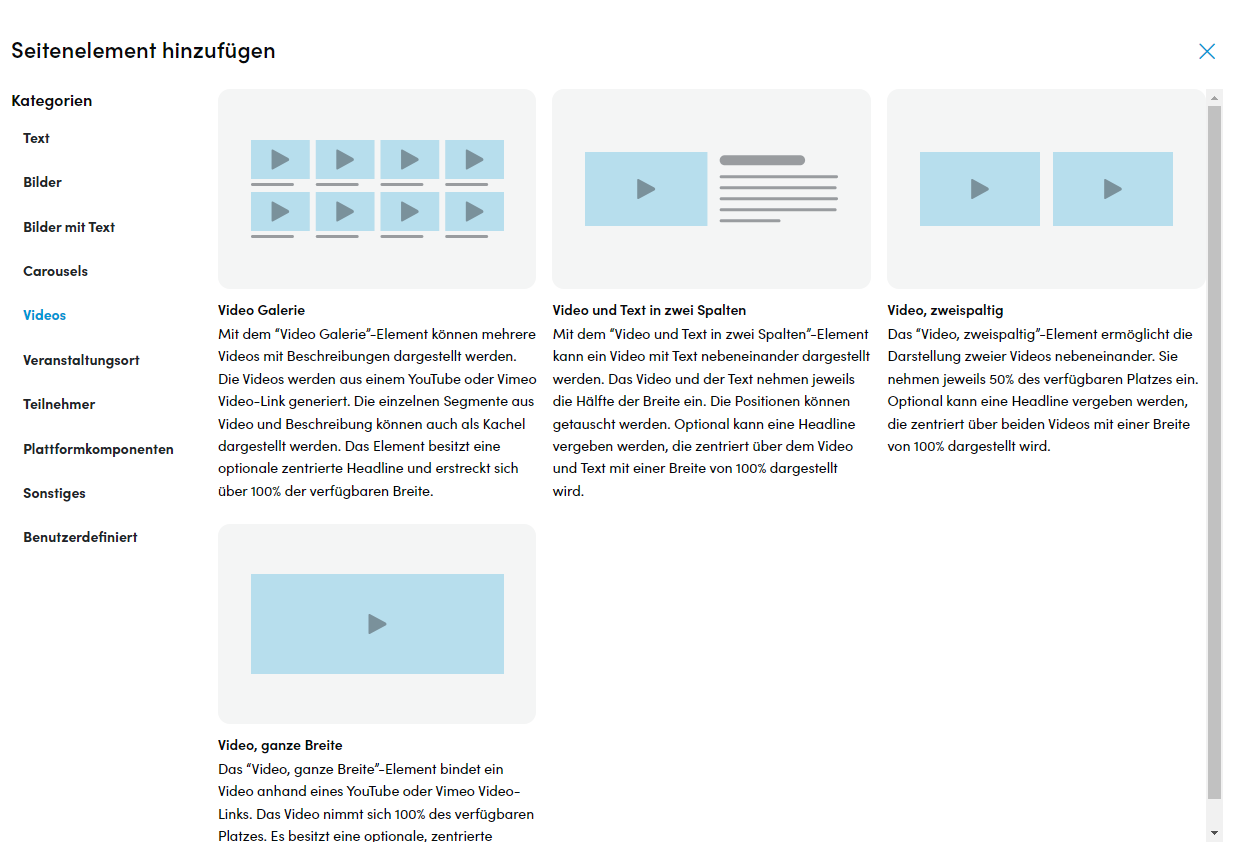
- Select the desired display format for the video page element. You will then be taken to an editing window:
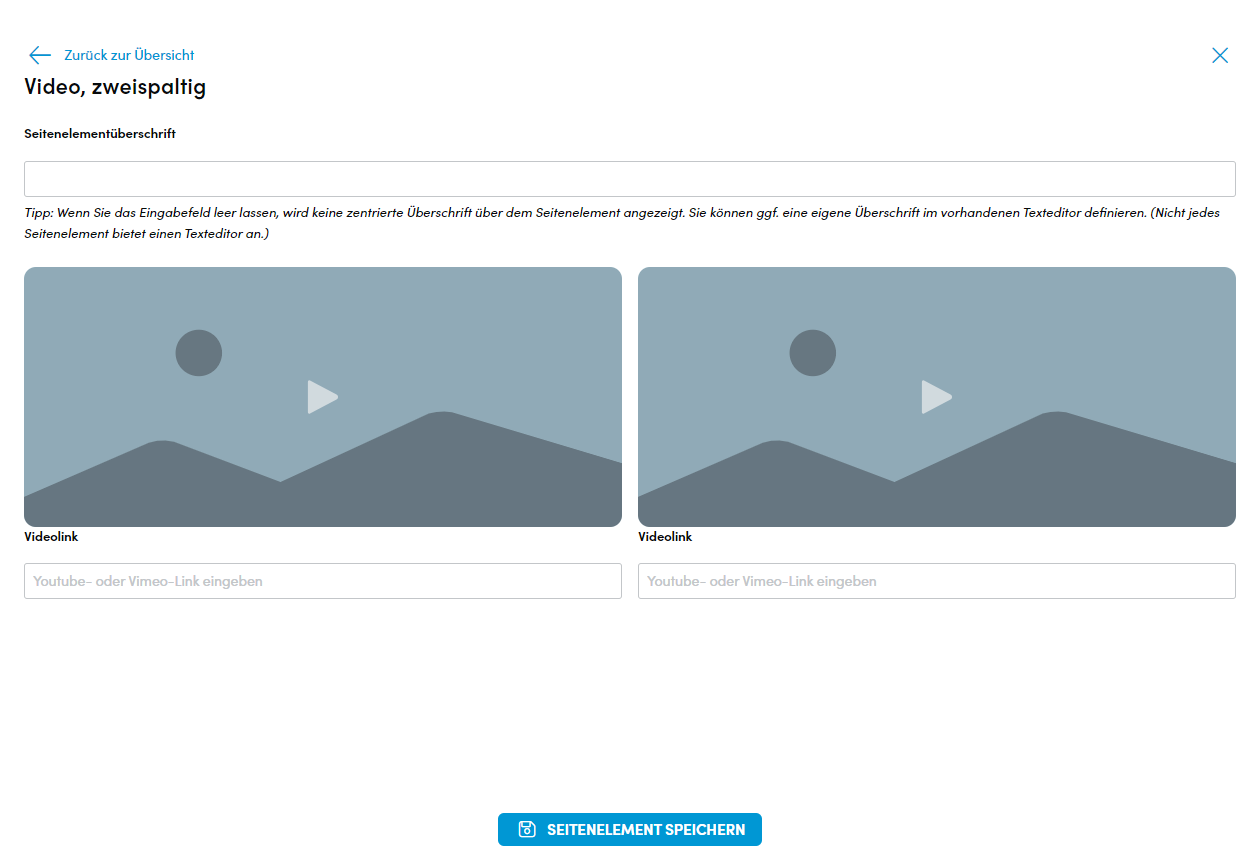
- You can enter a heading or leave the input field empty.
- Now insert the links of the videos into the respective input fields.
Note: Only YouTube and Vimeo links can be integrated into your platform.
If you have selected the page element Video and Text in two columns, make sure that the “Paste as text” symbol is activated so that no formatting problems occur when pasting.
- Click on save element to apply your changes.
Venue Element
You can use the corresponding page element to display the event location on an event landing page.
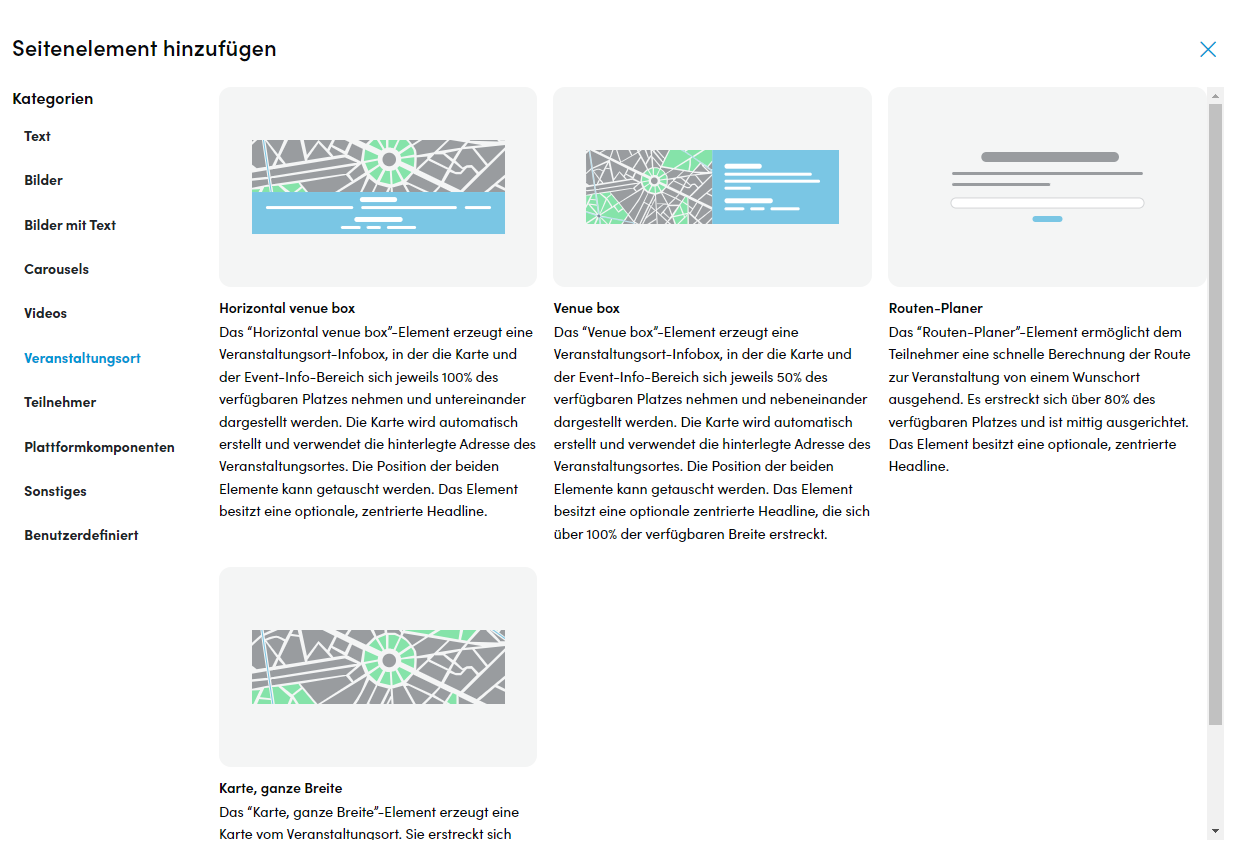
- Click on the desired type of event location element, you will then be taken to an editing window:
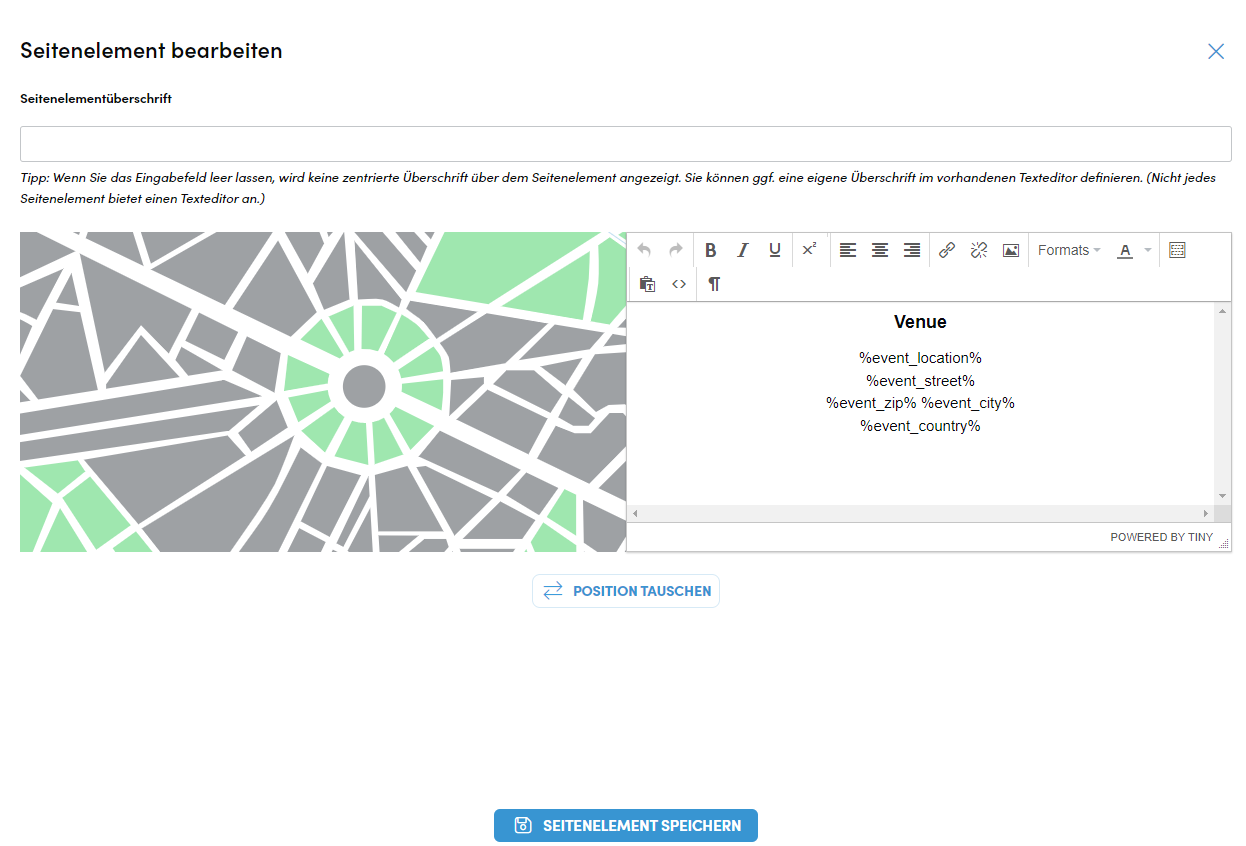
- The address is pulled from the event configuration and displayed in Google Maps.
- In addition to the section from Google Maps,by default the address is displayed in a text field. You can edit this field under Edit page element. You can, for example, include additional, useful information on how to get there.
Please Note: The displayed section from Google Maps is always generated from the event configuration, regardless of the entries in the text field next to it. If event location changes, please contact us so that we can make the changes in the correct place on the platform.
- You can change the arrangement of the created elements using the Swap position button.
- Once you have made all the settings, click Save element at the bottom.
Participants Element
With the Participants page element, you can create an overview with headshots/logos and names of the participating persons and/or companies that will be displayed on your event landing page.
Please Note: Before you make your participants’ data public on an event landing page, you should consult your company’s data protection officer.
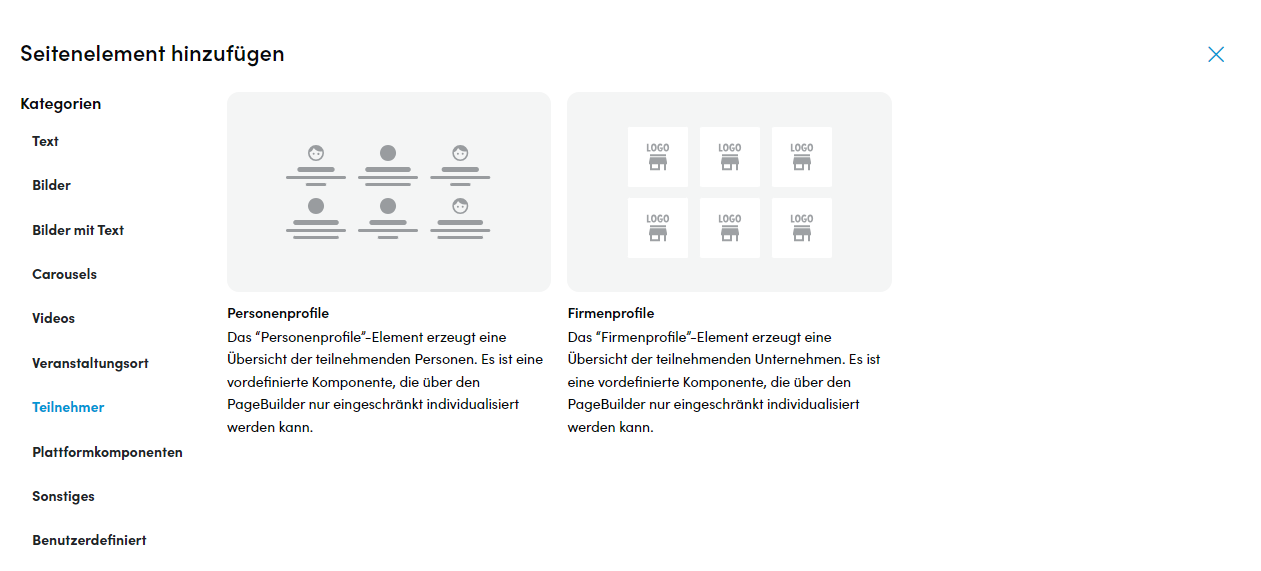
- Select whether you want to display personal or company profiles and make your settings in the editing window that opens:
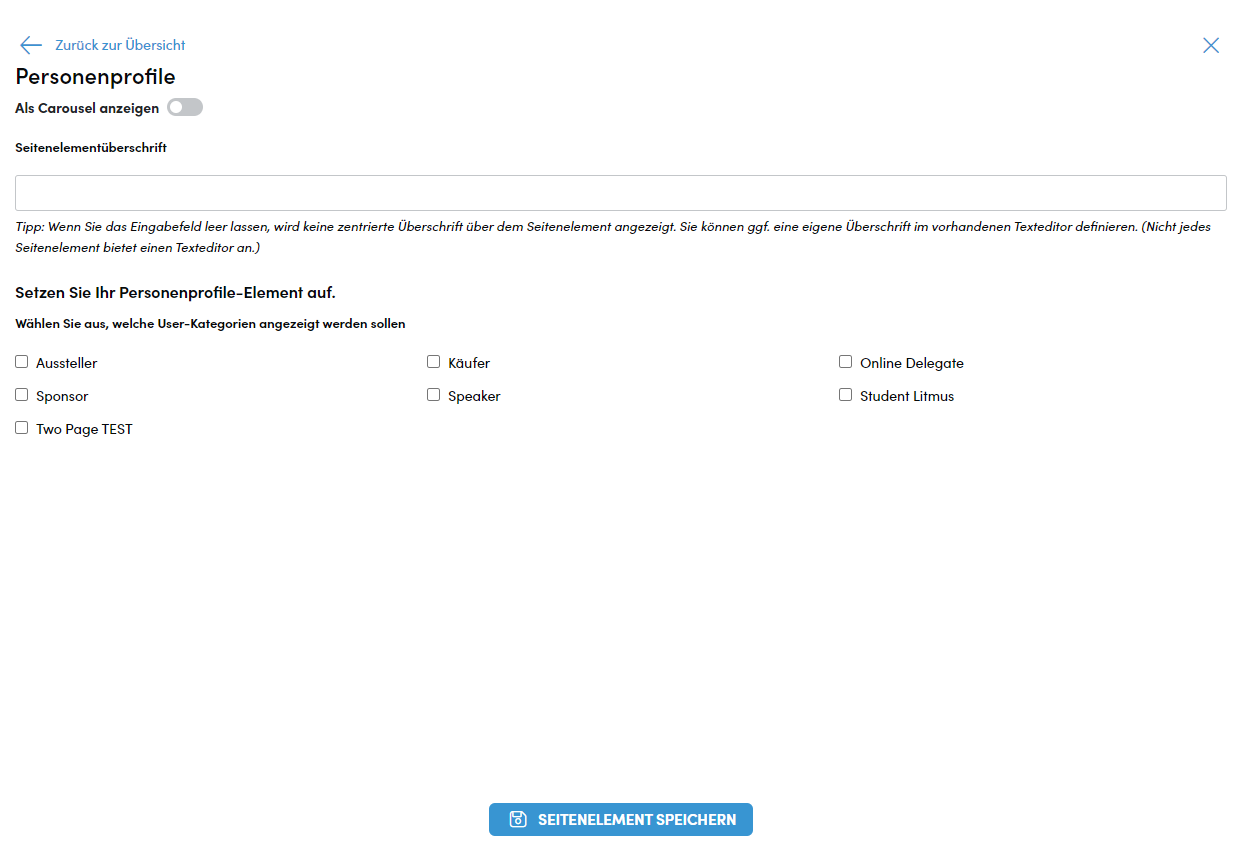
- You can enter a heading or leave the input field empty.
- Use the multiple choice fields to select the user categories you want to display.
- Click on save element to apply your changes.
Platform components Element
Under Platform components you will find page elements that cannot be customized or can only be customized to a limited extent.
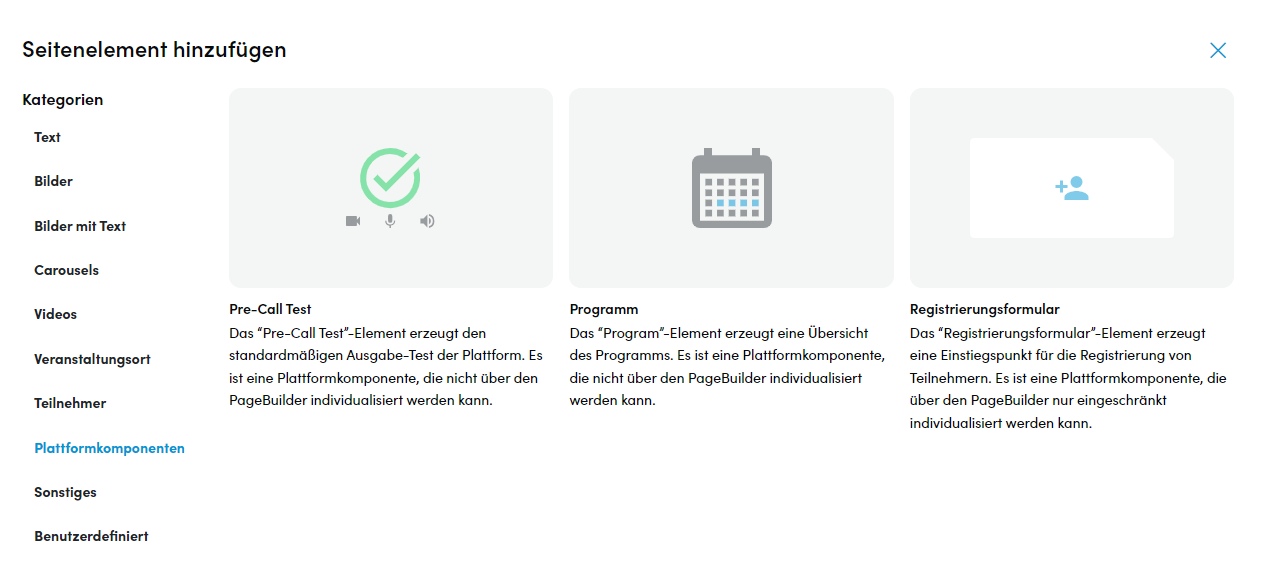
- Click on the desired element. The Pre-Call Test and Programm are then immediately added to the event landing page. If you have chosen the registration form or survey element, an editing window will open.
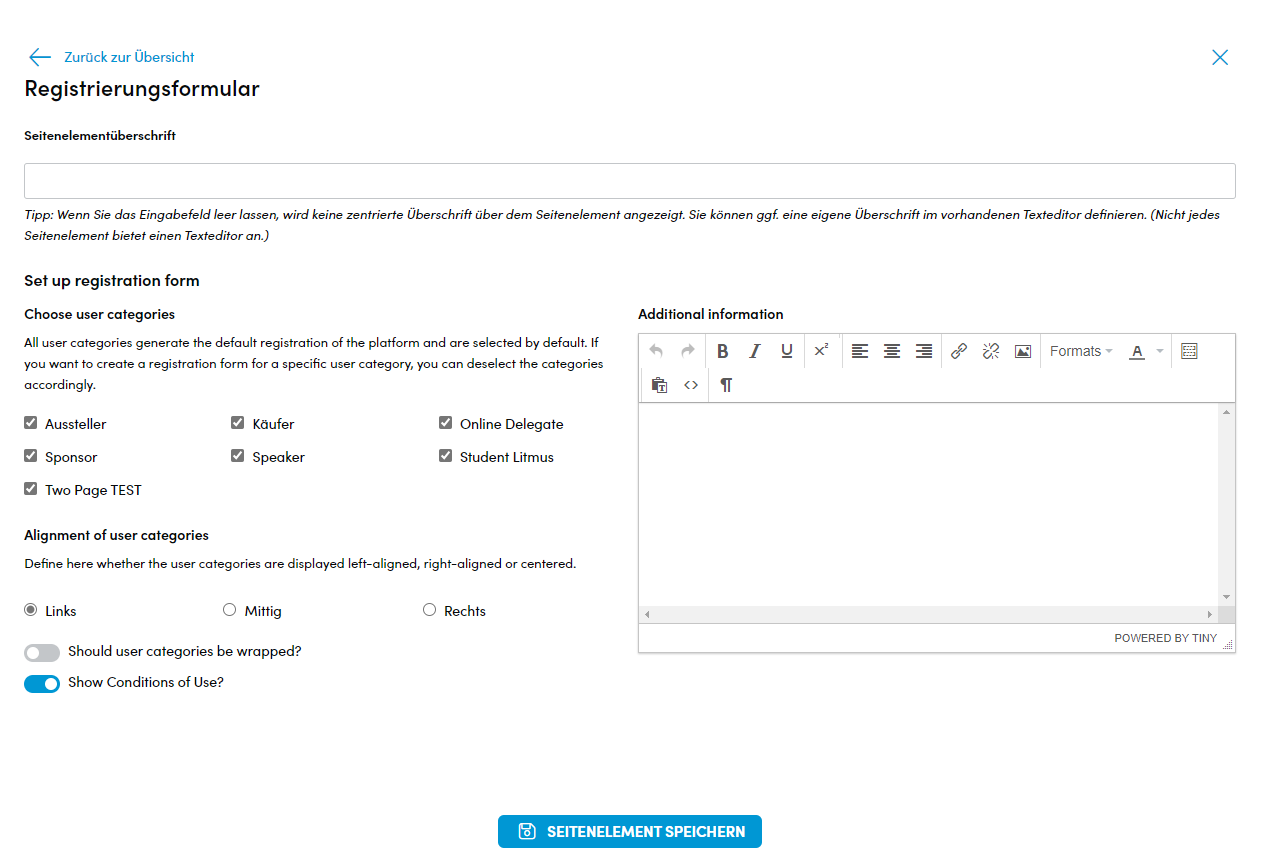
- You can enter a heading or leave the input field empty.
- All user categories are preselected by default. If you want to create a registration form for a specific user category, the other user categories must be deselected.
- Additional information that you would like to share with the respective participants can be added in the text field on the right.
- In the multiple-choice field Alignment of user categories, you can set how the user categories should be displayed.
- You can use the Should categories be wrapped? switch to select how the user categories are displayed on the page. If the switch is activated, they are displayed next to each other; if it is not activated, they are listed below each other.
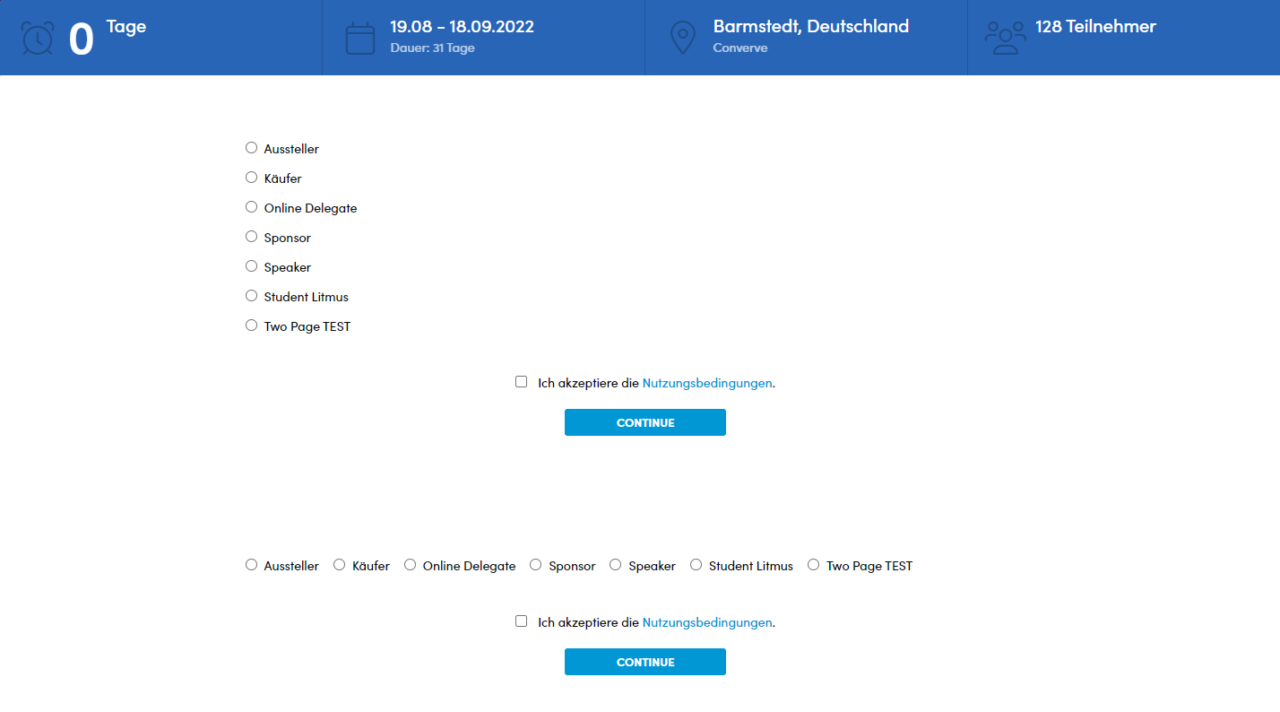
- Finally, you can select whether the terms of use should be displayed before users open the registration form.
- Click on save element to apply your changes.
Survey
- You can add a headline above the survey.
- From the dropdown select the survey form that has been created in the survey editor
- Click save element at the bottom.
- You can add more content above and below the survey but do not add more than one survey to the same page.
Please note: Your Converve contact can support you in creating a survey form.
Barcode / Link List / Bullet Content / Alias Page
Under other you will find the page elements Barcode, Link list, Bullet content and Alias Page
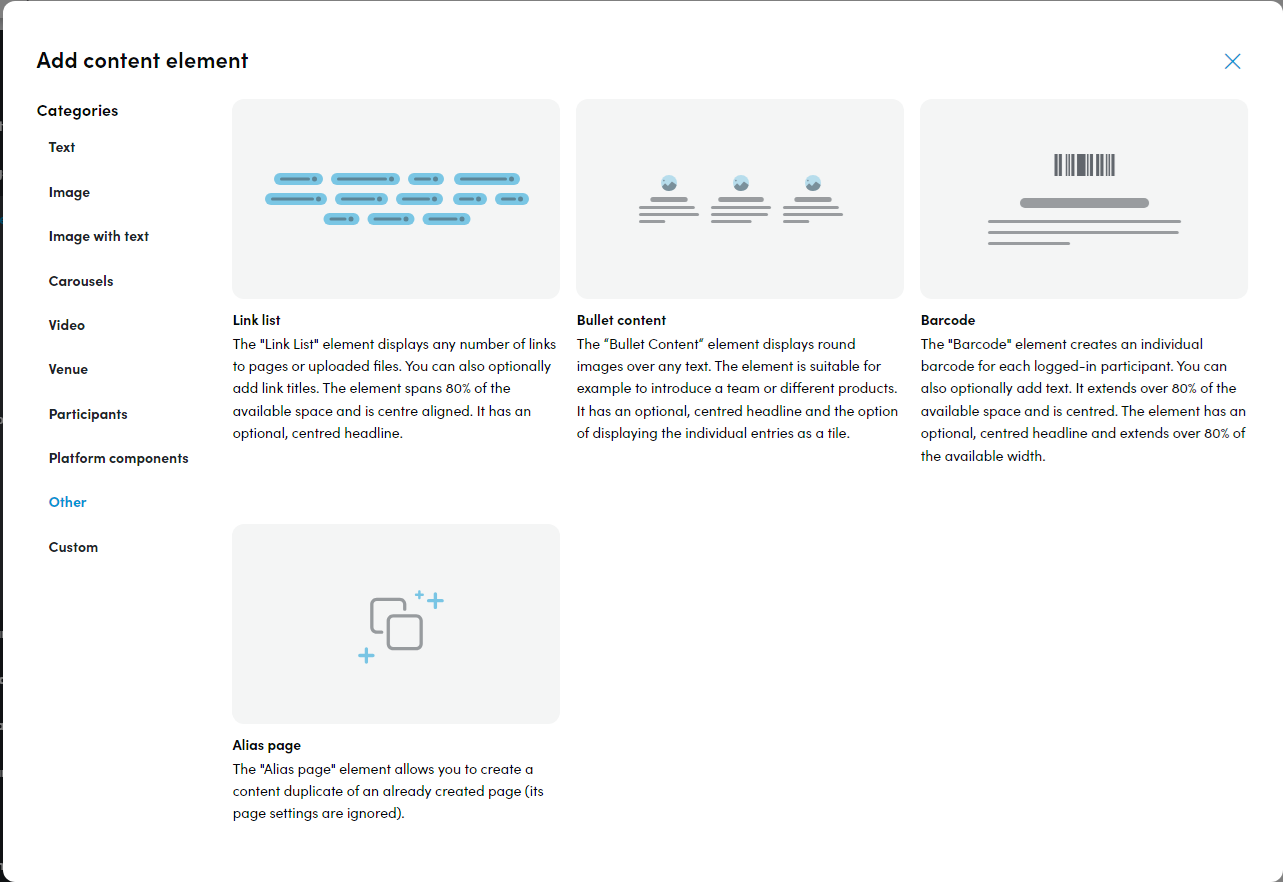
Barcode Element
- To insert a barcode, click on the corresponding element. You will then be taken to the following window:
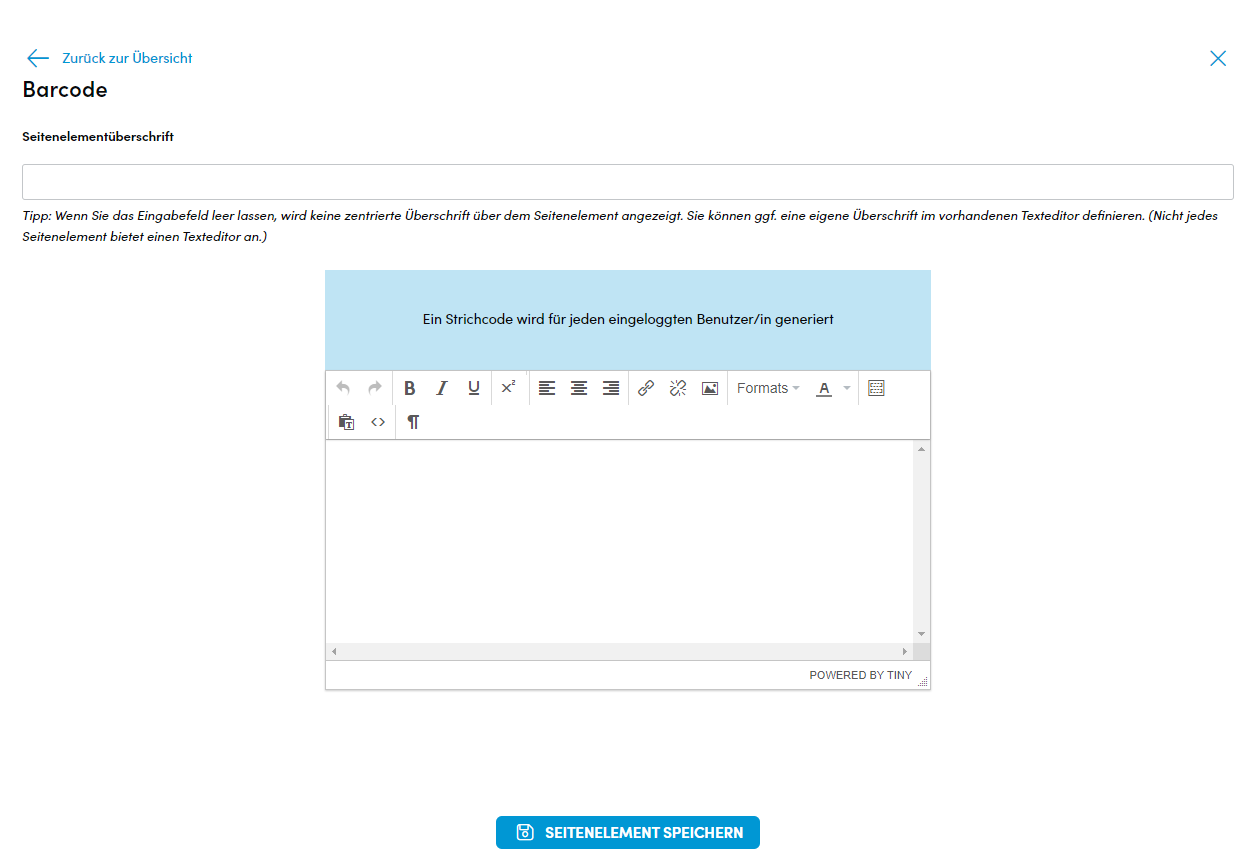
- You now have the option of adding a heading and/or additional information text. When copying text from Word, for example, make sure that the “paste as text” symbol is activated so that there are no formatting problems when pasting. Formatierungsprobleme gibt.
- Click on save element to apply your settings.
Link List Element
To add a Link list to your page, proceed as follows:
- Click on the corresponding element. You will then be taken to an editing window with a text field in which you can optionally enter a heading.
- To insert links, click on the blue Add first item button. The following window opens:
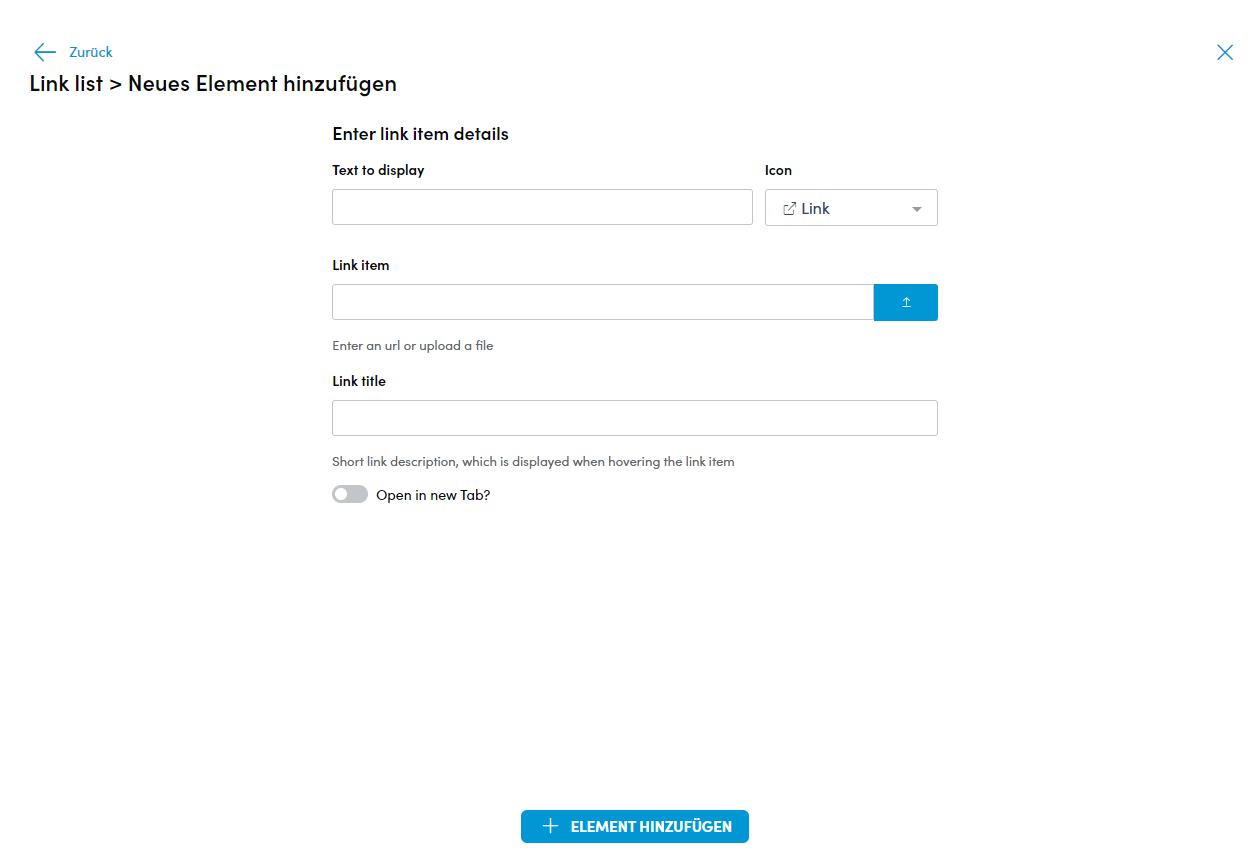
- In the field Text to displayenter the text that should be visible instead of the link.
- You can also select an icon from the Icon drop-down menu.
- Now enter a URL in the Link item field or select a document to upload using the blue button on the right.
- If you want a text to be displayed when the mouse pointer is over the link item, enter it in the Link title field.
- Finally, you can use the Open in new Tab? switch to specify whether the link or document should be opened in a new tab of your browser.
- To save the created element, click on Add element at the bottom. You will then see an overview of the links created so far.
- To create additional elements, simply click on the blue + at the bottom.
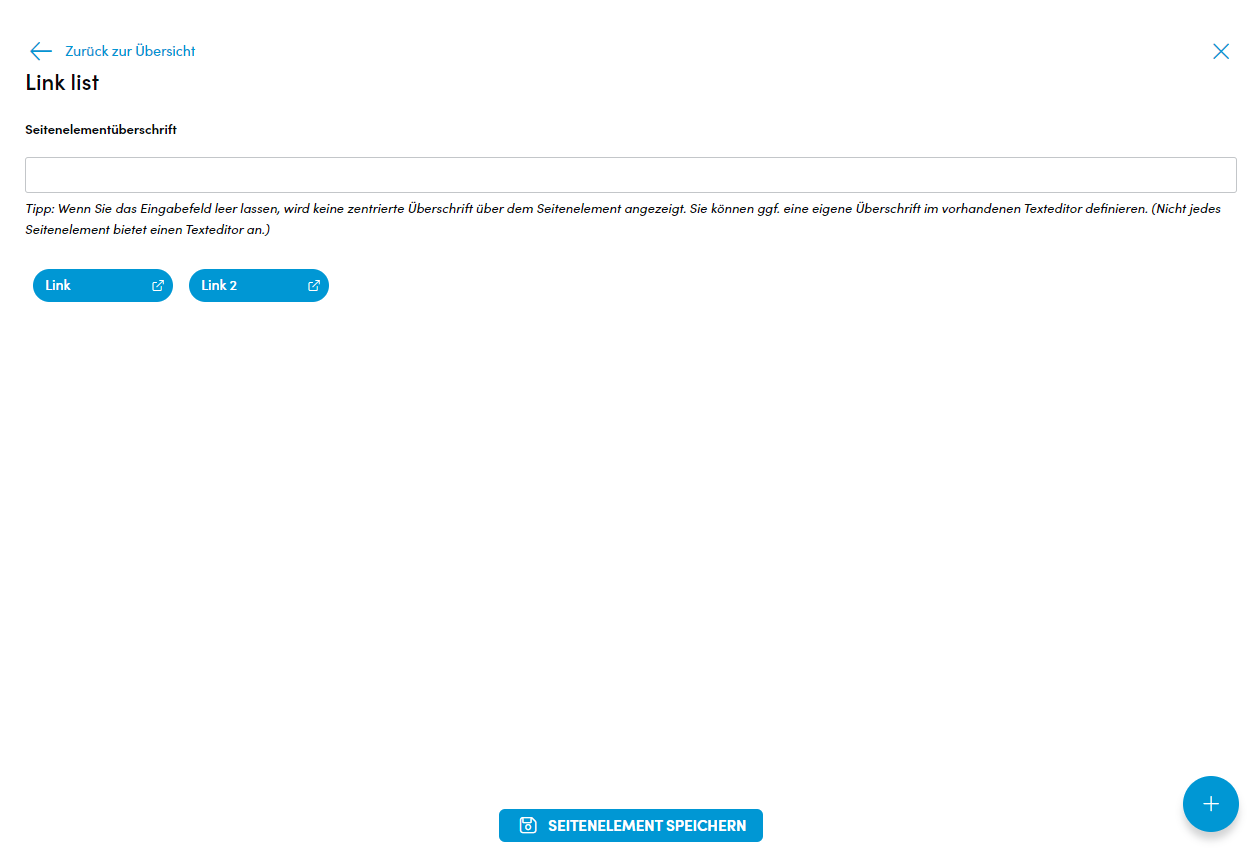
10. To apply all settings, click Save element at the bottom.
Bullet Content
Another page element is bullet content, which combines round images with text.
- Click on Bullet Content and Add first item in the editing window.
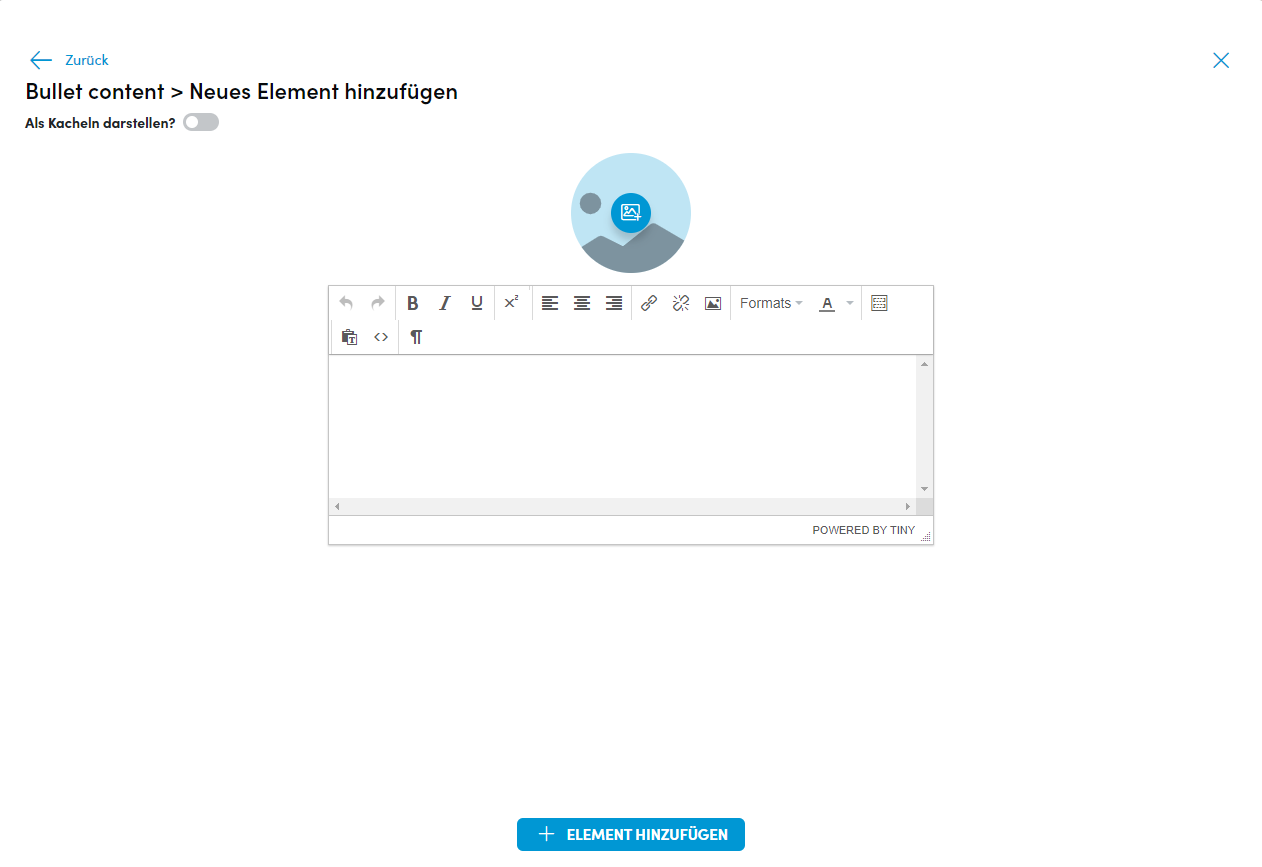
- You can now upload an image using the blue round button at the top and enter a text in the text field. When inserting text, e.g. from Word, make sure that the “paste as text” symbol is activated so that there are no formatting problems.
- To save the created element, click on Add element at the bottom. You will be redirected to an overview of the elements already created:
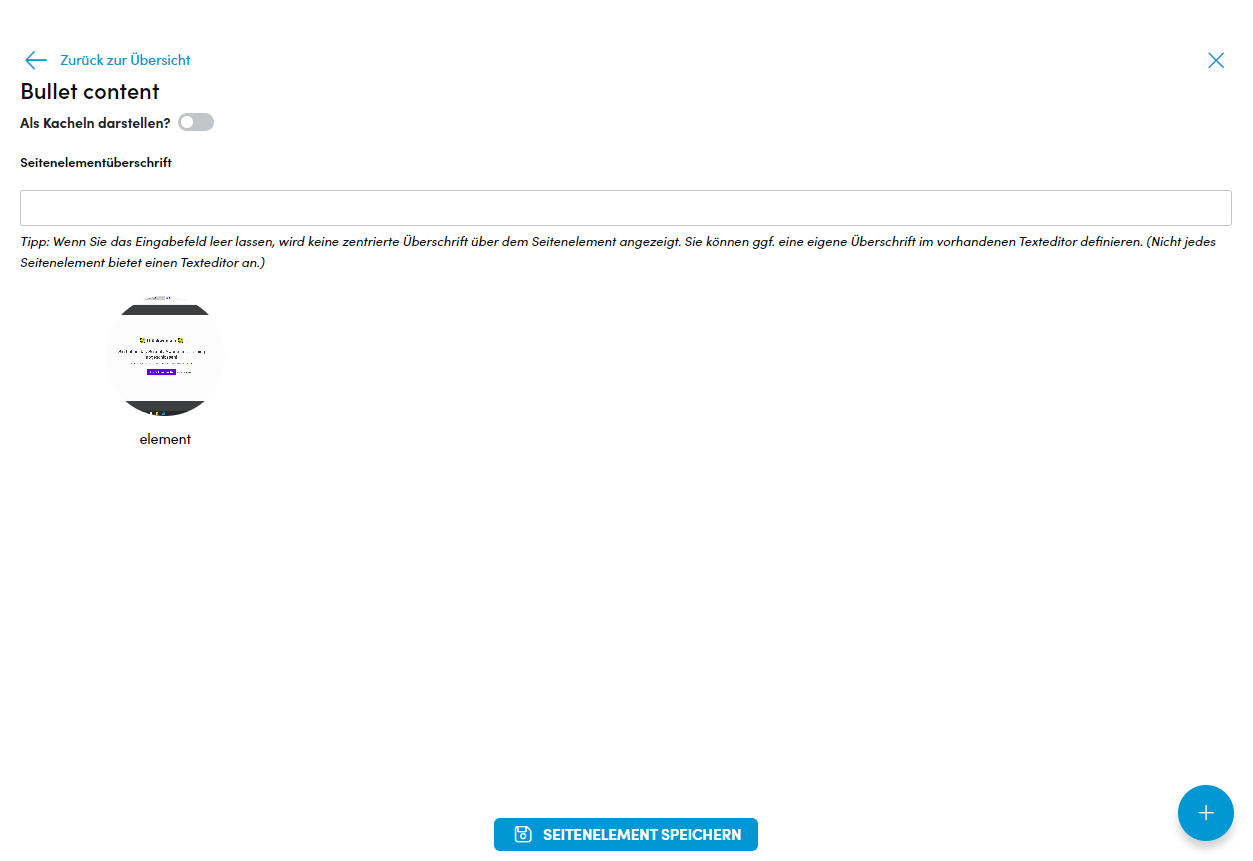
- To add another element, click on the blue +.
- To transfer all saved elements to your page, click on save element at the bottom.
Alias Page Element
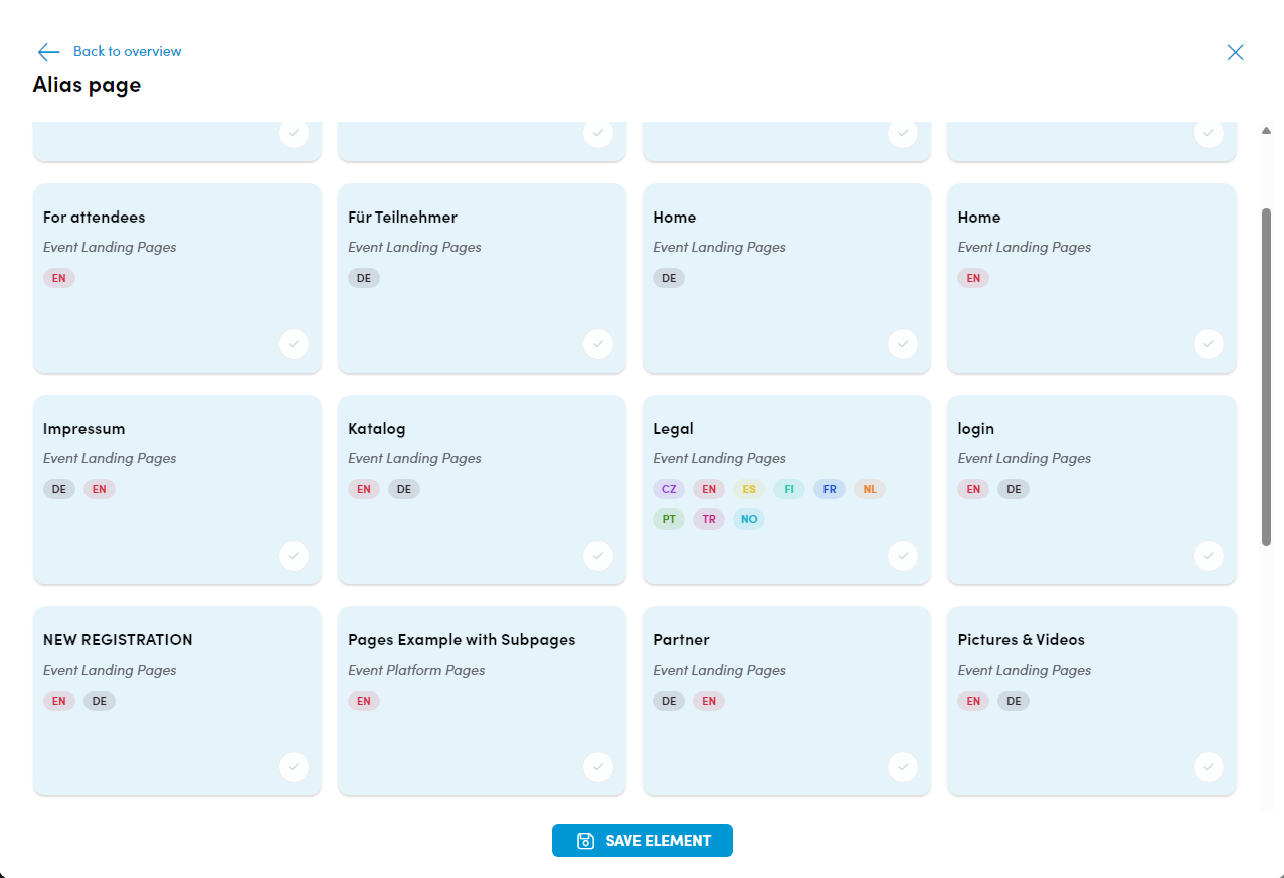
The “Alias page” element allows you to create a content duplicate of an already created page (its page settings are ignored).
To add an Alias Page to your page, proceed as follows:
- Select the page you want to create an Alias Page of
- Click save element at the bottom
- To make changes to the page, you need to make these to the original page.
Custom Elements
The custom elements are HTML structures. If you have sufficient knowledge of HTML, you are welcome to create the elements yourself, otherwise we will of course be happy to help you create them. Please do not hesitate to contact us.